Python openpyxl模块
Create a workbook
from openpyxl import Workbook
wb = Workbook()
创建好工作簿后,至少包含一个 Sheet ,可以使用Workbook.active 获取:
ws = wb.active
默认设置为0。除非您修改其值,否则您将始终使用此方法获得第一个工作表。
使用Workbook.create_sheet()方法创建新的 sheet
ws1 = wb.create_sheet("Mysheet") # insert at the end (default)
# or
ws2 = wb.create_sheet("Mysheet", 0) # insert at first position
# or
ws3 = wb.create_sheet("Mysheet", -1) # insert at the penultimate(倒数第二) position
重命名 sheet: Worksheet.title
ws.title = "New Title"
# 将 sheet ws 的名字改为 New Title
使用 RRGGBB 改变 sheet 的背景色:Worksheet.sheet_properties.tabColor
ws.sheet_properties.tabColor = "1072BA"

通过字典访问的方式获取 sheet:
ws3 = wb["New Title"]
获取当前工作簿中的 sheet:Workbook.sheetnames
print(wb.sheetnames)
# ['Sheet2', 'New Title', 'Sheet1']

# or You can loop through worksheets
for sheet in wb:
    print(sheet.title)
您可以在单个工作簿中创建工作表的副本:
source = wb.active
target = wb.copy_worksheet(source)
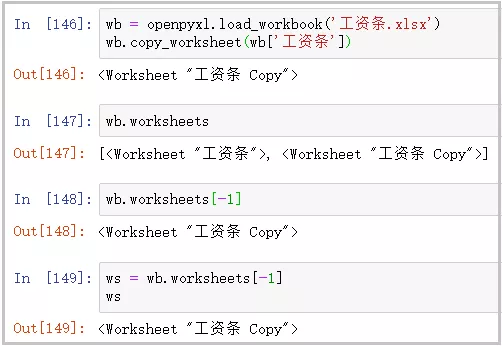
只复制单元格(包括值、样式、超链接和注释)和某些工作表属性(包括尺寸、格式和属性)。不会复制所有其他工作簿/工作表属性-例如图像、图表。
也不能在工作簿之间复制工作表。如果工作簿以只读或只读模式打开,则无法复制工作表。
如果是要从现有Excel里面导入数据,使用load_workbook函数即可:
from openpyxl import load_workbook
wb = load_workbook('data.xlsx')
要保存 Workbook,调用 Workbook 的 save函数就行:
wb.save('data.xlsx')
Sheet对象属性
Sheet对象有许多有用的函数和属性,基本的几个介绍如下。
title,即工作薄的名称,显示在Excel底部
>>> ws.title
'Sheet'
parent,即所属的Workbook的名称
>>> wb1 = ws.parent
>>> wb1 == wb
True
active_cell,即光标所在的单元格的编号
>>> ws.active_cell
'B5'
rows和columns,表示行和列的迭代器,通过for循环可以得到每行或每列的单元格元组>>> for row in ws.rows: ... print(row) ... (<Cell 'Sheet'.A1>, <Cell 'Sheet'.B1>) (<Cell 'Sheet'.A2>, <Cell 'Sheet'.B2>)
Cell对象的操作
获取对象
获取对象也有好几种方式,下面一一介绍。
cell(row, column, value=None)
- 通过工作簿对象的
cell函数获取
>>> c = ws.cell(row=1, column=1)  # 获取第一行第一列的单元格
>>> c.value  # 打印单元格的值
'姓名'
>>> c.value  = ‘Name’  # 重设单元格的值
通过工作薄对象的
[]函数来获取,这里面获取方式比较灵活,举例如下:>>> c = ws['A4'] # 获取第4行,第1列的单元格 >>> c = ws['A'] # 获取第1列的所有单元格 >>> c = ws['5'] # 获取第5行的所有单元格 >>> c = ws['A1': 'B10'] # 获取第1行第1列到第10行第2列的矩形区域内的所有单元格 >>> c = ws['A':'B'] # 获取第1列到第2列的所有单元格 >>> c = ws[1:10] # 获取第1行到第10行的所有单元格通过
iter_cols或iter_rows来得到:>>> for row in ws.iter_rows(min_row=1, max_col=3, max_row=2): ... for cell in row: ... print(cell) <Cell Sheet1.A1> <Cell Sheet1.B1> <Cell Sheet1.C1> <Cell Sheet1.A2> <Cell Sheet1.B2> <Cell Sheet1.C2>其中参数
min_col和min_row是迭代时起始的列号和行号,max_col和max_row是结束的列号和行号,都是包含在迭代内部的。>>> for col in ws.iter_cols(min_row=1, max_col=3, max_row=2): ... for cell in col: ... print(cell) <Cell Sheet1.A1> <Cell Sheet1.A2> <Cell Sheet1.B1> <Cell Sheet1.B2> <Cell Sheet1.C1> <Cell Sheet1.C2>
通过工作簿对象的
active_cell得到光标所在的单元格:>>> ws.active_cell 'B5'coordinate
此单元格的坐标(例如“A5”)
ws.cell(1,2).coordinate[:1]
# 'B'

ws.cell(1,2).coordinate[:]
# 'B1'
遍历文件的所有行或列
Worksheet.rows
>>> ws = wb.active
>>> ws['C9'] = 'hello world'
>>> tuple(ws.rows)
((<Cell 'New Title'.A1>, <Cell 'New Title'.B1>),
 (<Cell 'New Title'.A2>, <Cell 'New Title'.B2>),
 (<Cell 'New Title'.A3>, <Cell 'New Title'.B3>))
Worksheet.columns
>>> tuple(ws.columns)
((<Cell 'New Title'.A1>, <Cell 'New Title'.A2>, <Cell 'New Title'.A3>),
 (<Cell 'New Title'.B1>, <Cell 'New Title'.B2>, <Cell 'New Title'.B3>))
Values only
If you just want the values from a worksheet you can use the Worksheet.values property. This iterates over all the rows in a worksheet but returns just the cell values:
for row in ws.values:
    for value in row:
        print(value)

vA1
vB1
vA2
vB2
vA3
vB3
按行遍历输出 value
Both Worksheet.iter_rows() and Worksheet.iter_cols() can take the values_only parameter to return just the cell’s value:
以元组的方式返回整行或整列的数据
for row in ws.iter_rows(min_row=1, max_col=2, max_row=3, values_only=True):
    print(row)

('vA1', 'vB1')
('vA2', 'vB2')
('vA3', 'vB3')


for row in ws.iter_cols(min_row=1, max_col=2, max_row=3, values_only=True):
    print(row)
('vA1', 'vA2', 'vA3')
('vB1', 'vB2', 'vB3')
Saving to a file
The simplest and safest way to save a workbook is by using the Workbook.save() method of the Workbook object:
>>> wb = Workbook()
>>> wb.save('balances.xlsx')
Loading from a file
The same way as writing, you can use the openpyxl.load_workbook() to open an existing workbook:
>>> from openpyxl import load_workbook
>>> wb2 = load_workbook('test.xlsx')
>>> print wb2.sheetnames
['Sheet2', 'New Title', 'Sheet1']
Inserting rows and columns
insert_cols( idx , amount=1)在co l== idx 之前插入一列或多个列
insert_rows( idx , amount=1**)**在 row == idx 之前插入一行或多个行
The default is one row or column. For example to insert a row at 7 (before the existing row 7):
ws.insert_rows(7)
Deleting rows and columns
To delete the columns F:H:
ws.delete_cols(6, 3)
# 删除第六列即后面的三列(包含第六列)
方法:
append(iterable)在当前工作表的底部追加一组值。 如果是一个列表:所有值都是按顺序添加的,如果是dict,则从第一列开始:值被分配给键(数字或字母)指示的列
参数:
- iterable (list|tuple|range|generator or dict) – list, range or generator, or dict containing values to append
Usage:
- append([‘This is A1’, ‘This is B1’, ‘This is C1’])
- or append({‘A’ : ‘This is A1’, ‘C’ : ‘This is C1’})
- or append({1 : ‘This is A1’, 3 : ‘This is C1’})
insert_cols(idx, amount=1)在col==idx之前插入一列或多个列
insert_rows(idx, amount=1**)**在row==idx之前插入一行或多个行
delete_cols(idx, amount=1**)**Delete column or columns from col==idx
delete_rows(idx, amount=1**)**Delete row or rows from row==idx
max_column:包含数据的最大列索引(基于1)。 返回值:intmax_row:包含数据的最大行索引(基于1)。返回值:intmin_column: 包含数据的最小列索引(基于1)min_row: 包含数据的最小行索引(基于1)values: 按行生成工作表中的所有单元格值。Type : generatoriter_cols(min_col=None, max_col=None**, min_row=None, max_row=None, values_only=False)**从工作表中按列生成单元格。使用行和列的索引指定迭代范围。
如果没有指定索引,则范围从A1开始。
如果工作表中没有单元格,则返回空元组。
Parameters :
min_col (int) – smallest column index (1-based index)
min_row (int) – smallest row index (1-based index)
max_col (int) – largest column index (1-based index)
max_row (int) – largest row index (1-based index)
values_only (bool) – whether only cell values should be returned
返回值: generator
iter_rows(min_col=None, max_col=None**, min_row=None, max_row=None, values_only=False)**从工作表中按行生成单元格。使用行和列的索引指定迭代范围。
如果没有指定索引,则范围从A1开始。
如果工作表中没有单元格,则返回空元组。
Parameters :
min_col (int) – smallest column index (1-based index)
min_row (int) – smallest row index (1-based index)
max_col (int) – largest column index (1-based index)
max_row (int) – largest row index (1-based index)
values_only (bool) – whether only cell values should be returned
返回值: generator
calculate_dimension() 返回包含数据的所有单元格的最小边界范围(例如“A1:M24”)Return type : string
Working with styles
Styles can be applied to the following aspects:
- font to set font size, color, underlining, etc.
- fill to set a pattern or color gradient
- border to set borders on a cell
- cell alignment
- protection
The following are the default values
>>> from openpyxl.styles import PatternFill, Border, Side, Alignment, Protection, Font
>>> font = Font(name='Calibri',    # 字体
...                 size=11,    # 大小
...                 bold=False,    # 加粗
...                 italic=False,    # 斜体
...                 vertAlign=None,
...                 underline='none', # 下划线
...                 strike=False,  # 删除线
...                 color='FF000000')
>>> fill = PatternFill(fill_type=None,
...                 start_color='FFFFFFFF',
...                 end_color='FF000000')
>>> border = Border(left=Side(border_style=None,
...                           color='FF000000'),
...                 right=Side(border_style=None,
...                            color='FF000000'),
...                 top=Side(border_style=None,
...                          color='FF000000'),
...                 bottom=Side(border_style=None,
...                             color='FF000000'),
...                 diagonal=Side(border_style=None,
...                               color='FF000000'),
...                 diagonal_direction=0,
...                 outline=Side(border_style=None,
...                              color='FF000000'),
...                 vertical=Side(border_style=None,
...                               color='FF000000'),
...                 horizontal=Side(border_style=None,
...                                color='FF000000')
...                )
>>> alignment=Alignment(horizontal='general',
...                     vertical='bottom',
...                     text_rotation=0,
...                     wrap_text=False,
...                     shrink_to_fit=False,
...                     indent=0)
>>> number_format = 'General'
>>> protection = Protection(locked=True,
...                         hidden=False)
>>>
Cell Styles
>>> from openpyxl.styles import colors
>>> from openpyxl.styles import Font, Color
>>> from openpyxl import Workbook
>>> wb = Workbook()
>>> ws = wb.active
>>>
>>> a1 = ws['A1']
>>> d4 = ws['D4']
>>> ft = Font(color="FF0000")
>>> a1.font = ft
>>> d4.font = ft
>>>
>>> a1.font.italic = True # is not allowed # doctest: +SKIP
>>>
>>> # If you want to change the color of a Font, you need to reassign it::
>>>
>>> a1.font = Font(color="FF0000", italic=True) # the change only affects A1
# italic 斜体
Copying styles
Styles can also be copied
>>> from openpyxl.styles import Font
>>> from copy import copy
>>>
>>> ft1 = Font(name='Arial', size=14)
>>> ft2 = copy(ft1)
>>> ft2.name = "Tahoma"
>>> ft1.name
'Arial'
>>> ft2.name
'Tahoma'
>>> ft2.size # copied from the
14.0
Colours
字体、背景、边框等的颜色可以通过三种方式设置:索引、aRGB或主题。Indexed colours are the legacy implementation,颜色本身取决于工作簿或应用程序默认提供的索引。主题颜色对于颜色的互补色调很有用,但也取决于工作簿中的主题。因此,建议使用aRGB颜色。
aRGB colours
RGB颜色使用十六进制值设置为红色、绿色和蓝色。
>>> from openpyxl.styles import Font
>>> font = Font(color="FF0000")
alpha值理论上指的是颜色的透明度,但这与单元格样式无关。默认值00将添加到任何简单的RGB值:
>>> from openpyxl.styles import Font
>>> font = Font(color="00FF00")
>>> font.color.rgb
'0000FF00'
它还支持传统索引颜色以及主题和色调。
>>> from openpyxl.styles.colors import Color
>>> c = Color(indexed=32)
>>> c = Color(theme=6, tint=0.5)
Indexed Colours
Applying Styles
样式直接应用于单元格
>>> from openpyxl.workbook import Workbook
>>> from openpyxl.styles import Font, Fill
>>> wb = Workbook()
>>> ws = wb.active
>>> c = ws['A1']
>>> c.font = Font(size=12)
样式也可以应用于列和行,但请注意,这只适用于关闭文件后(在Excel中)创建的单元格。如果要将样式应用于整个行和列,则必须自己将样式应用于每个单元格。这是对文件格式的限制:
>>> col = ws.column_dimensions['A']
>>> col.font = Font(bold=True)
>>> row = ws.row_dimensions[1]
>>> row.font = Font(underline="single")